banner

Wednesday, September 12, 2012

No Bake Brownie Balls

Looking for a healthy nutritious snack? something to satisfy your sweet tooth but does not ruin your diet?  Then you need to make some No Bake Brownie Balls!

The recipe for No Bake Brownie Balls does not include eggs, butter, or processed sugar but they taste like they do. Why? I think it is the combination of the dates and almonds (sugary and buttery) and trust me no one would ever know they contain dates.

You should make these just because they include chocolate, take almost no time to make, and are super healthy and yummy!


No-Bake Brownie Balls
Makes 15 balls

Ingredients

15 pitted dates
2/3 cup unsweetened cocoa powder (plus extra for dusting)
1 cup roasted almonds (no salt added)
1 tablespoon honey
2 tablespoons water

Method

Add almonds to food processor and pulse until ground. Add dates, cocoa powder, honey, and water. Mix until it just forms a sticky mass. Wash hands and attempt to make a ball with the dough (it may need more water to get to the perfect consistency). Put a tablespoon of cocoa or confectioner's sugar on a plate. Roll balls in your hand and then roll in cocoa. Eat! These can be store in the fridge for a week.

For one brownie bite: 109 calories, 6.8 g fat, 12.2 g carbohydrates, 3.6 g protein, 3.5 g fiber

ENJOY!


Monday, September 10, 2012

Tuna Pie (Done by using a blender/ food processor)

This pie made by a blender is very practical and very light, and most importantly QUICK!
This is the first time I get to do it, and found that if used by a food processor to do the dough it would be more practical as it got a little thick to allow the blender to work properly.  I tried to scrub the sides and help it blend but didn't work much.  If you have a heavy duty blender I am sure this would work great.

The filling is based on your taste.  Here I used tuna.. I bet it would taste great with chicken, or even only veggie! or you can just use what you have at home.

Worth checking out!


Tuna Pie

Ingredients


Dough
3 eggs
1 cup oil
13 tbsp of AP flour
1 tbsp baking powder
1/3 cup grated mozzarella cheese
1 cup milk
salt to taste


Filling
2 cans of tuna (I believe it can be reduced to 1.5 or even 1 if you don't want it heavy in the filling)
2 tomatoes diced
half cup of canned corn
3 tbsp of mayonnaise
1 tbsp of ketchup
pinch of salt


Method

Mix all ingredients for filling and keep in fridge until being used.

Heat oven to 180 degrees C.

Mix in a bowl the flour, baking powder, mozzarella and salt.

Blend the eggs, oil and milk. Gradually add the flour mix by scoops, until fully incorporated.  I saw later that the blender wouldn't mix mix anymore so I just moved the mixture and used a spatula to join in the ingredients.  Finally add the baking powder and mix slowly. Place half of the dough in a baking dish, already buttered and floured.  Add to it half of the dough, then add the filling chosen and cover with the remaining dough and bake for about 1 hour or until you stick the toothpick and comes out dry..
 

Let cool, cut and serve.


ENJOY!

Sunday, September 9, 2012

Bruschetta with Tomato and Basil

 Bruschetta (pronounced "brusketta") is one of the simplest things in the world to make.  It is a delicious and easy appetizer. The balsamic vinegar gives it a little bite.

Bruschetta is a fresh, simple and delicious Italian appetizer that can be prepared in minutes and enjoyed any time of the year.   


Bruschetta with Tomato and Basil

Ingredients

     6 or 7 ripe tomatoes
     2 cloves garlic, minced
     1 Tbsp extra virgin olive oil
     1 teaspoon balsamic vinegar
     10 fresh basil leaves, chopped
     Salt and freshly ground black pepper to taste

     1 large French baguette
     1/4 cup olive oil

Method

Prepare the tomatoes first. Cut an X on the tomatoes and parboil the tomatoes for one minute in boiling water. Drain. Peel the skins off the tomatoes.  Once the tomatoes are peeled, cut them in halves or quarters and remove the seeds and juice from their centers. Also cut out and discard the stem area. 

Make sure there is a top rack in place in your oven. Turn on the oven to 450°F to preheat.
While the oven is heating, chop up the tomatoes finely. Put tomatoes, garlic, 1 Tbsp extra virgin olive oil, vinegar in a bowl and mix. Add the chopped basil. Add salt and pepper to taste.
Slice the baguette on a diagonal direction for slices. Coat one side of each slice with olive oil using a pastry brush. Place on a cooking sheet, olive oil side down. You will want to toast them in the top rack in your oven, so you may need to do these in batches depending on the size of your oven. Once the oven has reached 200°C, place a tray of bread slices in the oven on the top rack. Toast for 5-6 minutes, until the bread just begins to turn golden brown.
Alternatively, you can toast the bread without coating it in olive oil first. Toast on a griddle for 1 minute on each side. Take a sharp knife and score each slice 3 times. Rub some garlic in the slices and drizzle half a teaspoon of olive oil on each slice. This is the more traditional method of making bruschetta.

Align the bread on a serving platter, olive oil side up. Either place the tomato topping in a bowl separately with a spoon for people to serve themselves over the bread, or place some topping on each slice of bread and serve. If you top each slice with the tomatoes, do it right before serving or the bread may get soggy.

ENJOY!

Friday, September 7, 2012

Pizza Dip

Looking for a great appetizer recipe? or any good snack idea for visitors? this is a great one!  This pizza dip is creamy, addictive and delicious. It comes together very quickly, and it just tastes amazingly good. 

In this recipe you can feel free to use any pizza topping in it.  Yes, you can! - here I had in my fridge green pepper, beef salami, and olives, and the rest of the ingredients is all cheesy!
 
It tasted just like Pizza, but with a creamy taste.  I served it with toasted baguette slices, although it would also be great with pizza dough strips or pita chips.  Looking for a dip for your next party? try this! 


Pizza Dip

Ingredients
 
300 grams of cream cheese (softened)
½ teaspoon dried oregano
¼ teaspoon dried basil
1 cup shredded mozzarella cheese
1 cup grated Parmesan cheese
1 cup pizza sauce
2 tablespoons green bell pepper (chopped)
Beef Salami (chopped or sliced) - as much as you like
Black olives (sliced) - as much as you like


Method

In a small bowl mix together the cream cheese with oregano, parsley, and basil.

Spread the mixture onto the bottom of a any glass pie plate (or shallow oven-safe/microwave-safe dish). Sprinkle ½ cup of mozzarella cheese and ½ cup of the parmesan cheese on top of the cream cheese mixture. Spread the pizza sauce over the top of the cheeses. Sprinkle the remaining ½ cup of parmesan and ½ cup of mozzarella cheese over the top of the sauce.  Top with pepperoni, green pepper, and black olives.


Cover and microwave for 5 minutes. You can also place into the oven and bake at 175 °C for 15-20 minutes. 

Serve with toasted baguette slices, pita chips, or tortilla chips!


ENJOY!

Friday, August 31, 2012

Sfouf - Semolina Tumeric Cake

Sfouf is a Lebanese almond-semolina cake. It is made from semolina flour flavored with tumeric, sugar, and pine nuts or almonds.  This recipe calls for ground aniseed, which I was skeptical about at the beginning but it does add to the cake itself a very nice taste.

This is the first time I bake this cake, and I was surprised it does not contain eggs! So it is an egg-less cake which people that do not eat cake can do!  

Also, something different about this cake is the use of tahini to “butter” the tray or cake tin. It gives the edges a beautiful crunch and nuttiness. For an authentic experience, do not substitute the tahini with butter, trust me, it tastes great!


Sfouf - Semolina Tumeric Cake

Ingredients

2 cups semolina flour (ferkha in lebanese)
1 ½ cup all-purpose flour
1 cup vegetable or olive oil
1 tsp Turmeric (Curcuma)
1 tsp baking powder
1 tsp aniseed (ground)
1 ½ cups sugar
1 ½ cups milk (or water) - I used milk
2 tbsp Tahini (sesame paste)
Sesame seeds, sliced blanced almonds or Pine nuts, to garnish


Method
 

Preheat the oven to 350ºF (180ºC)

In a bowl, mix semolina, flour, turmeric, baking powder, and aniseed. Add oil and stir to make a paste.


In a separate bowl, melt sugar in cold milk. Add gradually to the flour and spices paste and mix using an electric cake mixer.


Grease the baking dish with Tahini and pour batter. Make sure it’s flat. Sprinkle with sesame, pine nuts or decorate with almonds.
I used almonds here.

Bake for approximately 30 minutes, or until golden-brown. Allow to cool for 15 minutes. Cut in pieces. Serve with tea or coffee.


ENJOY!

Sunday, August 26, 2012

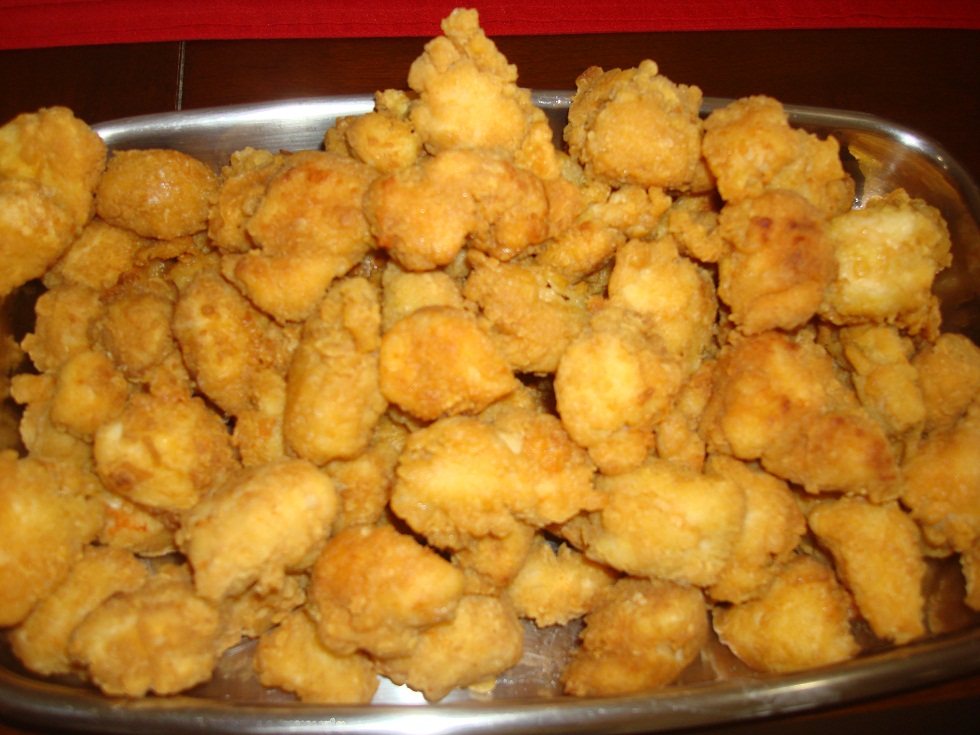
Sweet and Sour Chicken

Who doesn't love Chinese food? We do.  I am sure you do as well, maybe not all (like us) but some!.. How about some Sweet and Sour Chicken? The tangy flavor that lays in between sweet and sour, just as its name says, is a delicious dish! the added pineapple makes it taste tropical and exotic.  I love fruit in main dishes..

This was the first time I tried this recipe, including the sauce, which I thought at first to buy it ready, but then I was like I should try it!  I was skeptical at first for the quantity of sugar it takes in, now we know why it is sweet, and was surprised that apple cider vinegar was used to brake in the sweet taste.  

Forget take-outs or even going to a Chinese restaurant and try this quick and effective go-to recipe for when you want to enjoy this classic at a fraction of the cost.


Sweet and Sour Chicken

Ingredients

4 boneless, skinless chicken breasts (cut into bite size chuncks)
Salt and pepper
2 cups flour
5 teaspoons cornstarch
2 teaspoons baking soda
3 eggs (beaten with a fork)
oil (for frying)

1 ½ cup sugar
1/2 cup ketchup
3/4 cup cider vinegar
2 Tablespoon soy sauce
2 Tablespoons garlic powder

Vegetables
1 red pepper, sliced
1 yellow pepper, sliced
1 orange pepper, sliced
1 onion, cut into wedges/sliced
1 can of cut pineapples


Method

In a bowl mix flour, baking soda and 1 teaspoon of cornstarch. In another bowl beat the eggs. Dip chicken pieces first then the flour mixture, then in the egg mixture and then again in the flour mixture.

Fry in oil in a wok or in a deep fryer at 350 degrees in batches until golden brown. Drain on a tray, if you want use kitchen paper towels.


Place chicken in a single layer on a baking sheet. Mix sauce ingredients together and pour half of  it over the chicken and toss to coat. Bake for about 10 minutes at 200ºC, flipping them every 5 minutes. 

Meanwhile cook your veggies. Put a little oil in a pan and stir fry them. Bring the remaining sauce
to a simmer in a small pot and let thicken about 8 minutes. Pour the sauce over the vegetables. Mix the chicken and veggies together and add the pineapple and stir slowly so that the chicken pieces don’t break.  Serve over white rice. 

ENJOY!


Wednesday, August 8, 2012

Creamy Pumpkin Soup

This pumpkin creamy soup is simple and delicious, slightly sweet in taste; smooth in texture and beautifully yellow in color, will invite your diners with a pleasing fragrance and the warm golden hues of autumn. Filled with anti-oxidants and vitamins and gentle on the tummy, this is a warming soup that helps strengthen your immune system. Simple but delicious, this is a perfect soup to serve on a cold fall day, and it's also a great way to use up any pumpkins that aren't turned into jack-o-lanterns.

Wonderfully comforting soup, let me tell you..


Creamy Pumpkin Soup

Ingredients

1 kg pumpkin flesh, cubed
2 tbsp canola oil
1 onion, finely chopped
1 tsp ground cumin
1 tsp paprika
1 litre of chicken stock
salt
ground black pepper
half cup of cream

Method

Cut the peeled and seeded pumpkin into chunks, finely chop the onion.

Heat the oil in a saucepan, onions and stir. Fry gently for about five minutes, then stir in the cubed pumpkin.
Add the stock, season with salt, pepper, cumin and paprika. 

Bring to a boil, reduce heat and simmer for about 20 minutes, until the pumpkin has softened.

Pureé the soup in a blender of hand processor until smooth. Once before serving, pour in the cream.
Or if you want you could leave the cream for when its served, people can serve it with a dollop of cream and croutons (optional). 

ENJOY!

Sunday, June 24, 2012

Classic Baked Chicken

This dish it quite quick and delicious.  I learned it from a friend, and was surprised it contains so much garlic it doesn't taste like it!  We can't deny, garlic adds delicious taste and aroma to the dishes, so if you are a fan of this, you will love this recipe!

Sometimes I prepare this a night before, and store in the fridge and its ready to be made the next day in case I have a busy day ahead. 


Classic Baked Chicken 

Ingredients

1 kilo and half chicken pieces like breast, thighs, legs, etc. - washed and dried
1 whole garlic head, mashed
5-6 tbsp of ketchup
Juice of 2 lemons
Salt
Pepper
Oil

Method

Heat oven to 200 degrees C.

Mash the garlic cloves with a little salt.  Place it in a big bowl, mix in the ketchup, lemon juice, oil.  Add the chicken pieces, and put in desired salt and pepper.  If you think you need to add anything extra, go ahead, based on your taste! :)  

Place the final product in a baking tray, preferably a little deep like a rectangular pirex tray.  Cover with aluminum foil, and bake it for around 40 minutes.  Uncover and broil to give a nice color.

Serve with rice, mashed potato, steamed veggies, fries, you name it!

ENJOY!


Related Posts Plugin for WordPress, Blogger...